Creating a Gatsby Blog with Netlify
— blogging, coding, command line, web development, gatsby — 8 min read

Gatsby and Netlify together produce a powerful website building and hosting duo.
What is Gatsby?
Gatsby is a framework that allows developers to build websites and apps from scratch or from open source templates. It is a very powerful tool, but you have to get past a lot of annoying quirks to see the benefits of Gatsby. More on these later.
What is Netlify?
Netlify builds websites from repositories and instantly rebuilds your site with each new git push. Netlify can easily be used with Gatsby using the Netlify plugin on Gatsby.
Getting Started
I'm new to blogging, and I'm new to Gatsby, so I used a template. I decided to use the gatsby starter netlify cms template. There are a number of starter template options on the gatsby website. I chose the template I did because it already has the plugin set up to easily connect with Netlify.
Once you have a template chosen, you'll want to install the Gatsby CLI in order to work with Gatsby locally. Once that's taken care of, get started with your gatsby starter using the command line. For the template I used, you'll use the following command: gatsby new gatsby-starter-netlify-cms https://github.com/netlify-templates/gatsby-starter-netlify-cms
Be sure to install the template in the proper folder!!! It would have saved me hours of headaches to pay attention to this. Windows PowerShell defaults to the System32 folder within Windows for some reason. DO NOT put your Gatsby starter in this folder - this will make it exceedingly difficult, if not impossible, for you to work with your site.
Working with your Blog Locally
Once you have your Gatsby starter installed, you can go into your command line, run cd [your-project-folder-name] then run gatsby develop Now, go to http://localhost:8000 to view your site. If you used the Gatsby starter Netlify CMS template, your site should look like this:
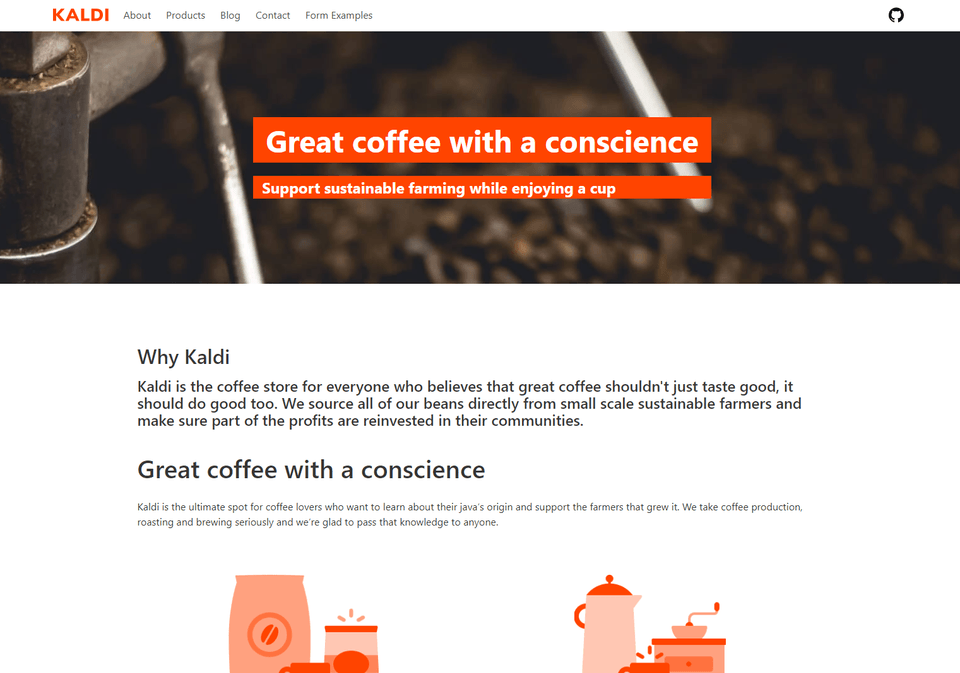
As you make changes to your site and save them, the site in your browser should automatically pick up the changes. If it doesn't, you may need to restart the Gatsby program. Go back into your command line and use Ctrl + C to close the program. Now, one annoying piece about Gatsby is that there is a cache that often leads to errors when you are making changes to your site. To avoid headaches over errors that are just due to this cache, you should get in the habit of running gatsby clean before gatsby develop each time, unless you have good reason not to do so.
Customizing your Blog
Alright, you can see your site locally. Excellent. How on earth do you turn this coffee website into your own blog?
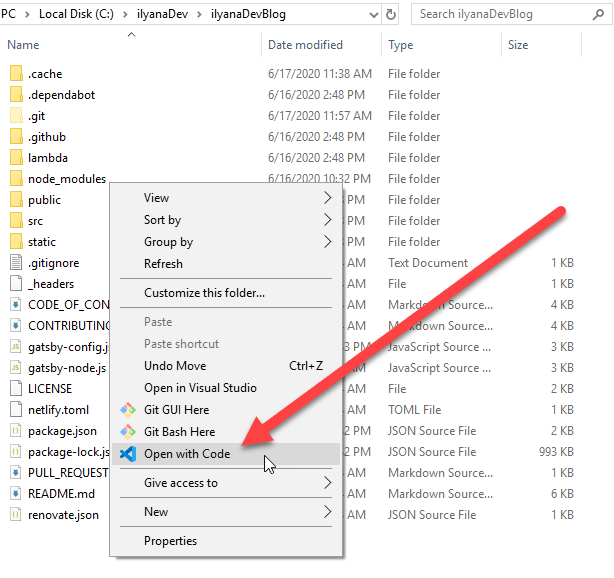
I use VS Code to edit my site. To open your site in VS Code (assuming you have VS Code installed), go to your folder and right-click, then click "Open with Code".
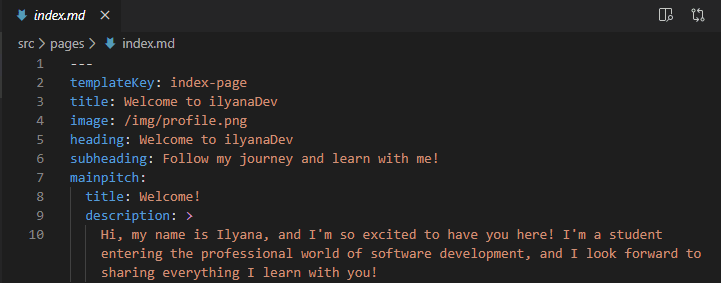
First off, let's change your heading and subheading on the index page of your site. To do this, you'll want to open /src/pages/index.md You will notice that this file is in Markdown. If you want some tips on working with Markdown, check out this post. At the top of this file, you'll see many different categories which you can edit, from templateKey (which you really shouldn't change) to title and image and, of course heading and subheading, which you should change to your heart's content. Just play around with it and see how changes in each area impact your site. You can edit other pages in much the same way by opening those Markdown files.
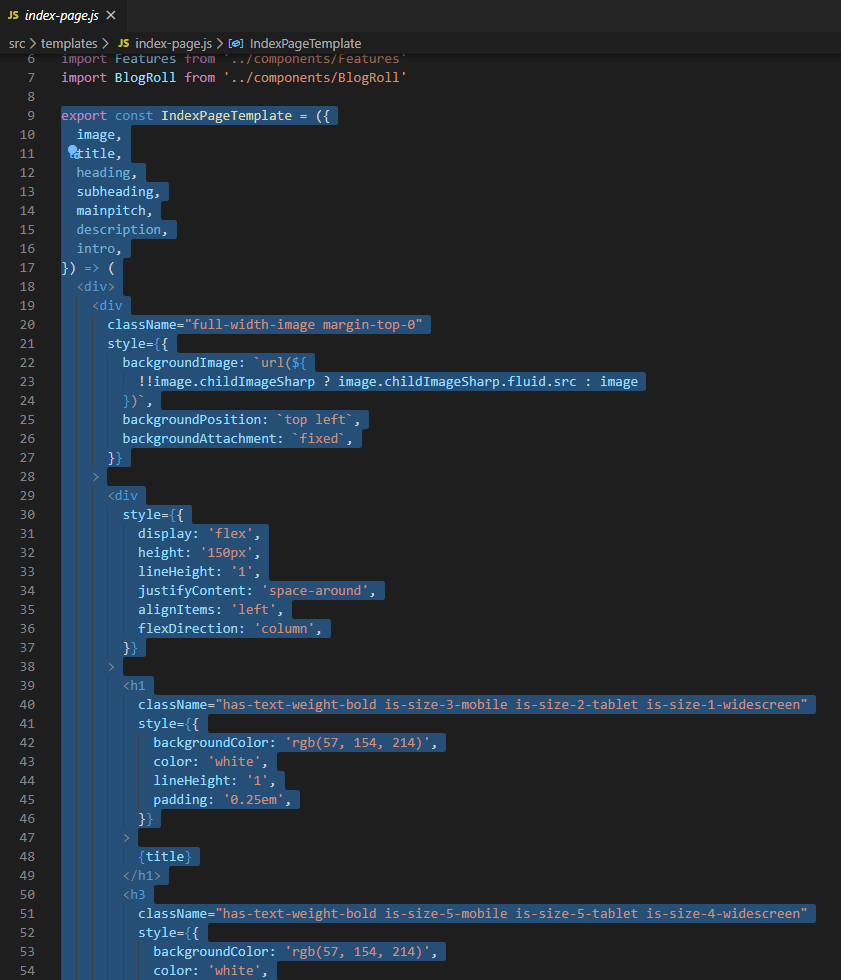
If you don't want a certain block of text or other page element, go to /src/templates/ and open the file of the page you're working on. Simply comment out or delete the necessary lines of code in the export const [Page-You're-Editing]PageTemplate block of code.
You can also alter the image in the header of your index page. I've found that Gatsby's image processing procedure often leads to errors when your file is a jpg, for some reason, but png's work very reliably, so I'd recommend converting whatever file you're planning to use into a png. You should also save it in /static/img/ and list your image path as /img/[file-name].png
Now, let's say you decide you don't need a certain page. For example, "Products." I don't sell anything - why would I need a Products page? To eliminate this page, you'll need to do a few things. First, go to /src/components/Navbar.js and delete the block of code corresponding to the link to that page:

You'll need to do exactly the same thing in /src/components/Footer.js
Next, you should go to /src/pages/ and delete the entire folder pertaining to your desired page. You should also delete the corresponding file under /src/templates/
Now, even though you've changed some images and text, your entire website is probably still filled with the orange color scheme of the Kaldi example company. If you don't want to keep this color scheme, you'll need to create your own. Find some colors you like and their hex and RGB codes. This site is pretty handy for this.
Next, to change most of the colors in your site, you'll want to play around in the /src/components/all.sass file to see how changing a given hex code impacts your site. However, to alter the text in your page headers, you need to do something slightly different using RGB codes instead. Go into the .js file in /src/templates/ for whichever page header you want to change. Scroll down until you see a block or two of code that look like this:
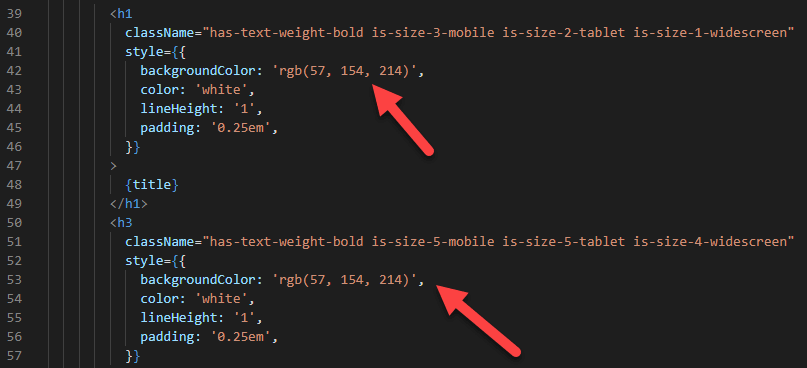
Next, simply change the RGB codes to alter the colors of your header text blocks.
There are lots of other ways to customize your site and make it your own, but these are the most useful things I found as I created this site.
Blogging
Blogging is actually fairly simple. Just create a new Markdown file in /src/pages/blog/, and be sure to give it the necessary frontmatter, which you can copy and paste from one of the sample blog posts provided in the template:
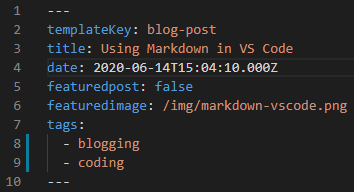
You can now edit the frontmatter to give the post a custom title, image, tags, etc. Again, don't alter the templateKey If you've done this correctly, your new blogpost should automatically be visible on your local site. You can delete the sample blog posts' Markdown files before you publish your site, but it can be useful to keep them for the moment to refer back to.
You can now edit the body of your blog post in VS Code. For some tips on writing blog posts in Markdown, click here.
Connecting with Netlify
Connecting with Netlify is actually a fairly simple process at this point, which is great news for you! You can follow this tutorial for a pretty good explanation.
Essentially, you'll want to make sure you've put your blog into a gitHub repository. From here, you should connect your repository to Netlify, which is very easy and intuitive in Netlify's UI. If you complete all the steps in the above tutorial, your site should now update automatically every time you push a new commit to your repository. You can also use Netlify to connect a custom domain to your site.
Additional Resources
As you have discovered by now (or will discover in the near future if you continue to work with Gatsby), Gatsby is somewhat error-prone. Luckily, there are lots of online forums where you can look for help. First of all, if you want to see what I've done with my blog and compare your code with mine, you can view my GitHub repository here.
For more information on writing blog articles in Markdown, check out this previous post of mine. I also have a post on configuring Google Analytics for your site here.
Here are some other resources I found useful in working my way through building my blog:
- Step-by-step of getting started
- Some explanations of GraphQL queries (which were the source of 90% of my Gatsby errors)
- How to style your site in Gatsby
- Gatsby commands in command line
- Repository of another developer who used this template and his website
- Forum discussions of common error messages
Summary
- Gatsby is error-prone, but when it works, it works really well
- Netlify is a great way to implement continuous development on your site using Gatsby and GitHub
- To get started on your blog, choose a Gatsby template, install it, and open http://localhost:8000 to view it locally
- There are a million and one ways to customize your site
- Create new blog posts by adding new Markdown files to
/src/pages/blog/ - Connect to Netlify and publish your blog!
Thanks for reading! I hope you find this and other articles here at ilyanaDev helpful! Be sure to follow me on Twitter @ilyanaDev.